Sunday, May 18, 2014

DIY: Recycled Gift Bag Headband!


This Saturday I had the chance to attend a pretty eclectic and fun wedding. As I was getting ready, I realized I'd planned the perfect outfit but had neglected to plan any type of hairstyle to go with my fancy gold dancing shoes. I had a look around my craft room and for the life of me could not find a single piece of tulle (blasphemy!!) to make a quick fascinator. What I did find was a stack of pink pull string gift bags. I found some black feathers, grabbed a black head band and some washi tape and got to work!


First I clipped a few feathers from the bunch and wrapped their ends with the washi tape just to hold them together.


Then, I began to cut simple leaf shapes out of the gift bags. I cut off the pull string top, folded them in half and cut out 7 sets.


I pinched two leave shapes together and began attaching them to the feathers with the washi tape. Pinch and wrap until all of the leaves are snug and happy on the feathers.


I attached my little leaf and feather bunch onto a headband with the washi tape! Presto! A fancy new hair adornment with things I had laying around the craft room. My inner hoarder is laughing and shaking her head saying, "see, this is why we never throw anything away!"

      p.s.    
This is my sister and I on our way to the wedding! Don't you LOVE her beehive? I saw the tutorial on Mollie Makes and begged her to let me try it! The first attempt left a lot to be desired, but the second was absolutely fantastic! You can check out the tutorial here. It's incredibly adorable.


Thursday, May 15, 2014

Fabric Road Trip


My mom and I have started a recent tradition. Each April, just as the flowers start to pop their heads out of the warm ground, we take a Fabric Road Trip four hours south to the charming city of Paducah, Kentucky. Paducah is the home to the National Quilt Museum and every April, the American Quilter's Society starts its quilt show season in its hometown. Nestled next to the Ohio River, with cobblestone streets and enough southern charm to choke a chicken, it's the perfect place to spend a few days digging through literal mountains of fabric. The entire city turns itself into one enormous quilt store. Every empty store front and back room is rented out to traveling fabric salespeople. It's quite a sight to see. The city is easily walkable from one end to the other. With a cool breeze coming off of the river and the Spring sun beating down on you, it may very well be what heaven is like for a crafter.


The Paducah Convention Center is filled with thousands of quilts from all over the world. They are works of art made of strips of fabric and miles of thread. I'm always overwhelmed with how much patience and time went into each piece. I'm fascinated with how many of the quilts come out of Japan. I wonder what a Japanese quilt store looks like? I think I need to hop a plane and find out!


After the quilts and the $3/yard fabric, my favorite part of the trip is eating a Kirchoff's. It's such an amazing place. The bakery is heavenly. The food is delicious. If you want to eat what is perhaps the best sandwich in America, go to Kirchoffs and order the Big Lou. Sit outside in the courtyard drink some iced tea, enjoy the splendor of the ENORMOUS trees that line the street and thank God you are alive.


This year I scored 27 yards of fabric to turn into animals, make a new summer dress and to tackle a few other crafty endeavors. But mostly, it's such a nice time to spend with my mom and my second mother, Ruth. We eat, talk sewing, soak up some sunshine and I listen to them laugh. I can't wait until next year.


Monday, April 21, 2014

Mr. Banana has surgery.


Untitled

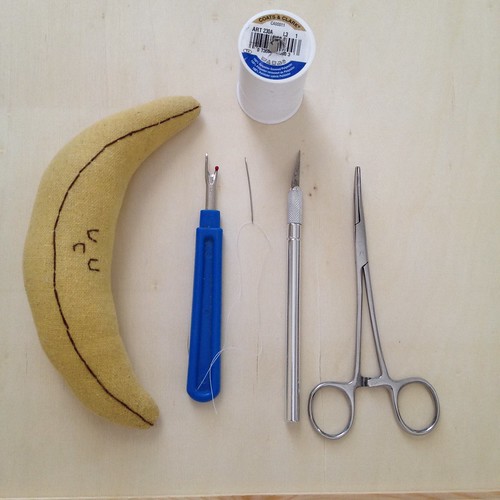
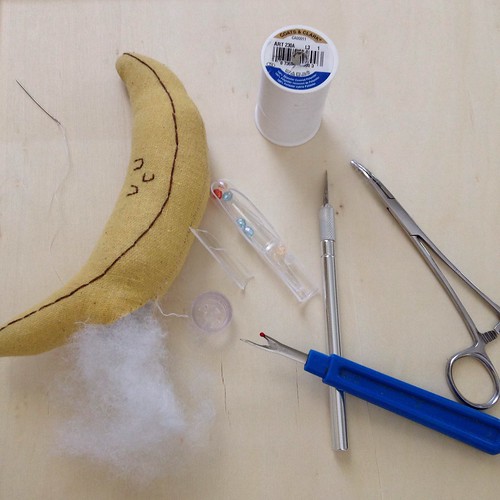
A few weeks ago, there was a small banana surgery inside The Wind and The Sail studio. Dr. Laura was on duty to repair a small fracture in the rattle bone. The whole procedure was set to take less than an hour with a small incision, a removal of the cracked rattle bone and a new one inserted into its place.


The incision was made with a small x-acto scalpel. The broken bit was carefully removed, then a new prosthetic was inserted. Mr. Banana was stitched up without incident or too much stuffing being lost. 


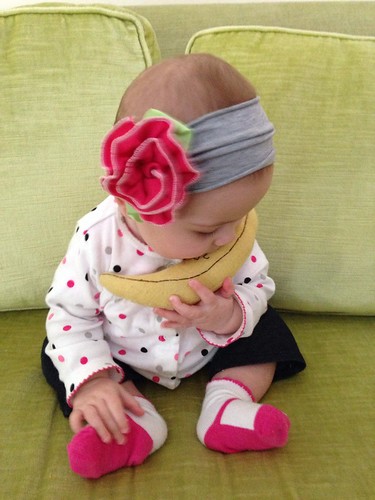
He is now back home with a happy baby Isabell who loves her banana to pieces! Literally.

A small note: Baby Izzy is my newest niece and had quite a night a few months ago. She had a small seizure at home and due to the type of seizure that occurred, she was sent to Riley Children's Hospital. It was a worrisome couple of days, but when I met my sister and her fiance at the hospital, I brought her a banana so that she could have something in the bed with her to play with. She has latched onto Mr. Banana. It's so touching to be able to make something with my own hands that can comfort someone I love to the ends of the earth. Being a plush maker is worth every effort, 80 hour work week and sleepless night ever. I love my job.

Saturday, April 19, 2014

all for the love of a dress.


I have this very wonderful dress that I've worn for seven years. Yes, seven years. The worst part is that I bought this perfectly comfortable dress secondhand. So really, this dress is on its fifth or sixth life. Last week, as I pulled it out of the dryer, I noticed how thin the fabric is getting. What will I wear on mega production days where I sit in front of the sewing machine of 18 hours? I turned it inside out and looked at the seams and said to my cat Hal, "oh yeah. I can make one!" I decided to spend my saturday making a new version of my absolute favorite dress.  

Materials: Jersey fabric, pins, pencil, scissors, wrapping paper and my seven year old dress.
I like to put left over wrapping paper to use because most of it comes with a one inch graph on the back. It makes it easier to lengthen things and make small adjustments and keep lines straight.


I laid each section of the dress, starting with the arms, onto the paper and simply traced around them. I added a quarter inch to each side that would have a seam to allow for a seam allowance. I added an entire inch on each side that would need a hem, i.e, the neckline, the sleeves and the bottom.


After each piece was traced, I cut the pieces out of the wrapping paper and pinned it onto the fabric, just like you would a real paper pattern. Pin and cut, pin and cut, pin and cut.


All of the pieces have been cut! If you decide to try this yourself, you can look at the seams inside your dress to find out how they put it together. Look to see which seams have been sewn over twice, which seam has been sewn over by another seam. A tip is most dresses are put together from top to bottom. 

And LOOK! A finished dress for me to romp around my garden in! I'm laughing because my neighbors caught me taking a picture of myself in my new dress! I'm a total dork. 


Happy Sewing!

Tuesday, April 1, 2014

Aqua Hippo Mailbox Hood Ornament

Spring is rushing to my doorstep and it just makes me want to be outside making the world bright. After cleaning the winter ick off my porch and sweeping away some errant fall leaves, I noticed how terribly bland my mailbox was looking. I decided it needed a hood ornament.

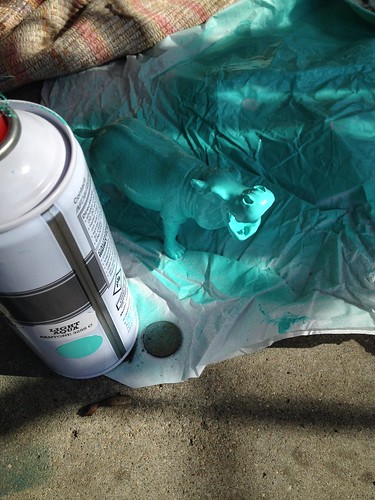
Being the kind of person I am, there was a perfect plastic hippo sitting on my craft room shelf. I decided to spray paint him aqua...

Aqua Spray paint


add a little E-6000...

E-6000


and stick him to my mailbox! Now every time you step up to my front door, you are greeted by a roaring hippo. I think it's rather perfect! Happy Spring!

Hippo Mailbox Hood Ornament

LinkWithin

Related Posts with Thumbnails